When building new apps, you need both client and server-side pieces. This article focusses on how to structure a SPA that is made out of angular for the client and dotnet core for the server.
There are numerous questions I needed to answers when mixing these technologies.
- Should I host my angular app inside an MVC View or just serve the angular app from static files.
- Should I host the angular app inside the same application that serve the Web-Api or serve it from a separate site?
- How to setup a productive development environment?
- How should I integrate angular-cli together with a ASP.NET Core app?
- Should I use Vs.Code or VisualStudio ?
- How to package and deploy the application for on prem or in the cloud?
Of course, the answer to all these questions is always the same: it depends! After experimenting with several options, I finally decided that I should go for the simplest solution that could possibly work and started with just serving static files inside a Web-Api application. Yet, during development, what I found the most productive, is to completely separate the Angular app from the Web-Api solution. I like that my Angular and the ASP.NET Web-Api apps live separate folders beside each other. It’s only at build time that Msbuild assemble the parts by calling “ng build”. To do that I needed to configured angular-cli to output the build in the \wwwroot folder of the ASP.NET app.
Concerning the IDE, what I found the most productivity was to develop my angular app using Vs.Code. Thus far, for the Web-Api part I tend to prefer VisualStudio and Resharper. So, I optimized my Angular app for working with Vs.Code and my Web-Api project for VisualStudio. During development I usually run the backend and launch the Webpack dev server through an “npm start” command. At publish everything is nicely packaged together inside a ASP.NET app, so deploying to Azure can simply be done by using the VisualStudio publish wizard.
On my github project core-angular-example, you can download the solution template I use for making SPA’s with Angular-cli and DotNet Core.
Here I explain the steps you need to follow to setup the basis of such an app:
0) First you need to install:
1) From a powershell console:
mkdir angular-dotnetcore
cd angular-dotnetcore
mkdir web-api
cd web-api
dotnet new webapi
cd ..
ng new angular-app
2) Open VisualStudio code and open the angular-dotnetcore folder
3) Disable TypeScript compilation
Since we will eventually have TypeScript files in our project, we should also disable any TypeScript compilation errors. Open the web-api.csproj file and modify the top PropertyGroup:
  <PropertyGroup>

    <TargetFramework>netcoreapp2.0</TargetFramework>

    <TypeScriptCompileBlocked>true</TypeScriptCompileBlocked>

    <TypeScriptToolsVersion>Latest</TypeScriptToolsVersion>

    <IsPackable>false</IsPackable>

  </PropertyGroup>
4) Configure Startup.cs
As our web-api app will also serve the static files we need to configure the Stratup.cs file as follow:
public void Configure(IApplicationBuilder app, IHostingEnvironment env)
{
    if (env.IsDevelopment())
    {
        app.UseDeveloperExceptionPage();
    }

    app.UseDefaultFiles();
    app.UseStaticFiles();

    app.Use(async (context, next) => {
        await next();
        if (context.Response.StatusCode == 404 &&
            !Path.HasExtension(context.Request.Path.Value) &&
            !context.Request.Path.Value.StartsWith("/api/")) {
                context.Request.Path = "/index.html";
                await next();
            }
    });

    // Configure application for usage as API
    // with deafult route '/api/[Controller]'
    app.UseMvcWithDefaultRoute();

    // Serve static files
    app.UseStaticFiles();
}
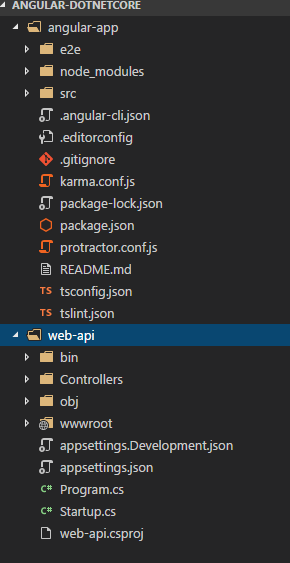
5) Configure angular-cli to output the build inside the wwroot of the web-api app =>
edit the .angular-cli.json file and change the OutDir parameter:
"apps": [
    {
      "root": "src",
      "outDir": "../web-api/wwwroot",
Now when running ng build inside the angular-app angular-cli should output the result inside the wwroot folder of the web-api app.
 6) Modify the angular app to consume data from your web-api
Edit the following files under /angular-app/src/app file=>
App.module.ts:
import { BrowserModule } from '@angular/platform-browser';
import { NgModule } from '@angular/core';

import { AppComponent } from './app.component';
import { HttpModule } from '@angular/http';

@NgModule({
  declarations: [
    AppComponent
  ],
  imports: [
    BrowserModule,
    HttpModule
  ],
  providers: [],
  bootstrap: [AppComponent]
})
export class AppModule { }
Modify app.component.ts:
import { Component, OnInit } from '@angular/core';
import { Http } from '@angular/http'
@Component({
   selector: 'app-root',
   templateUrl: './app.component.html',
   styleUrls: ['./app.component.css']
})
export class AppComponent implements OnInit {
   constructor(private _httpService: Http) { }
   title = "DotNet Core Angular Example";
   apiValues: string[] = [];
   ngOnInit() {
      this._httpService.get('/api/values').subscribe(values => {
         this.apiValues = values.json() as string[];
      });
   }
}
Edit app.component.html and add this as last lines of the html file:
  <li>
    <h2>Values from ValuesController</h2>
    <p *ngFor="let value of apiValues">{{value}}</p>
  </li>
</ul>
7) Redirect api calls to your DotNet core app
To be able to redirect api calls from your angular app when running in the webpack dev server you should create a proxy.conf.json file on the root of your angular app. Here my dotnet webapi runs on port 5000:
{
    "/api": {
      "target": "http://localhost:5000/",
      "secure": false
    }
}
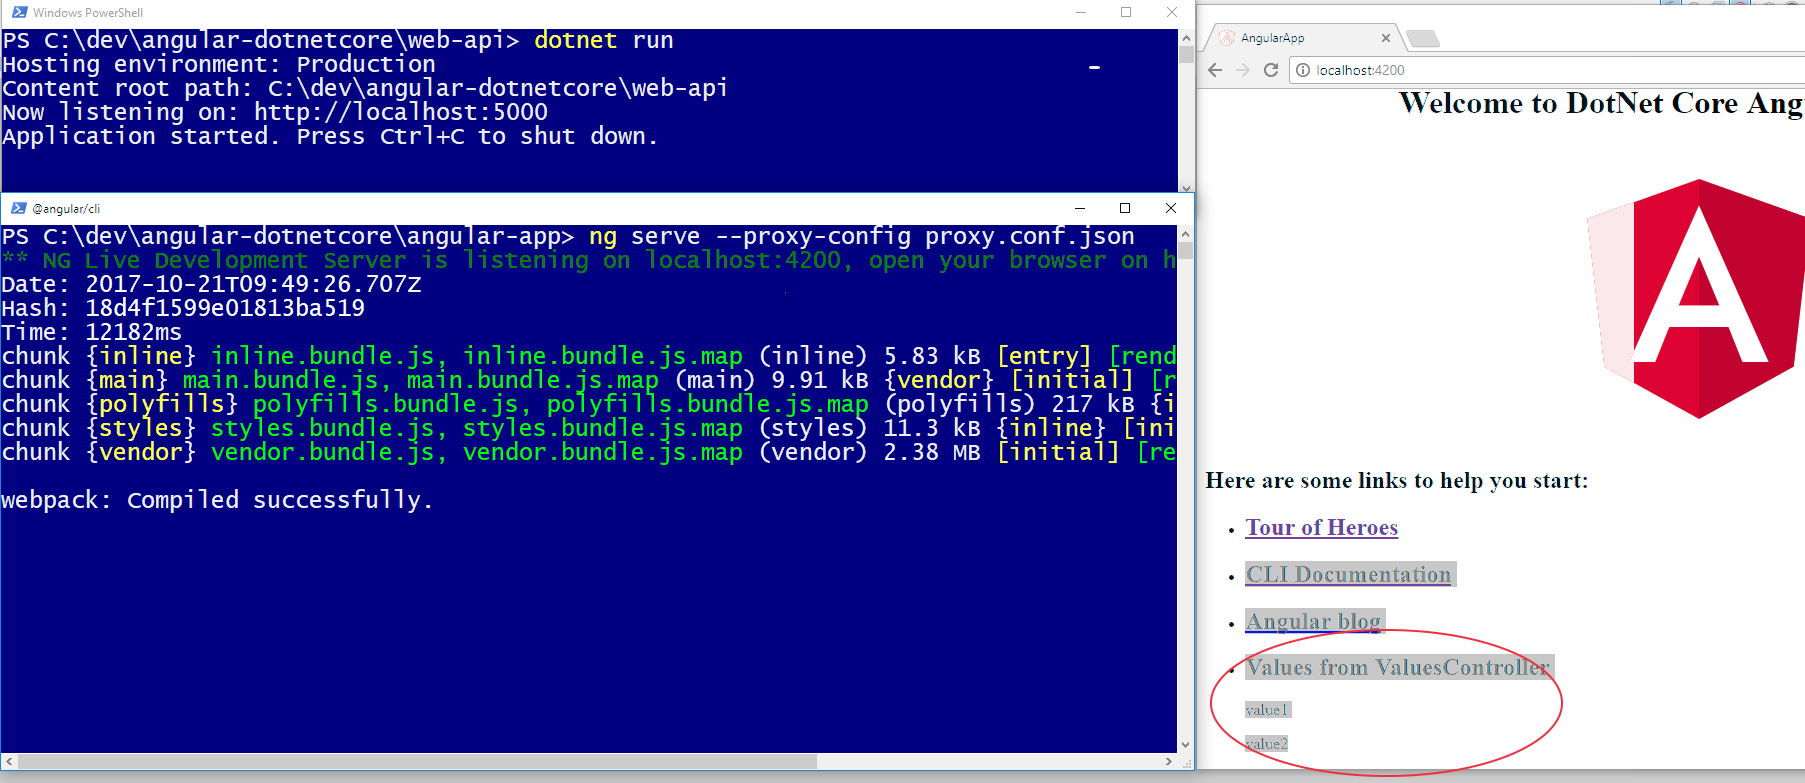
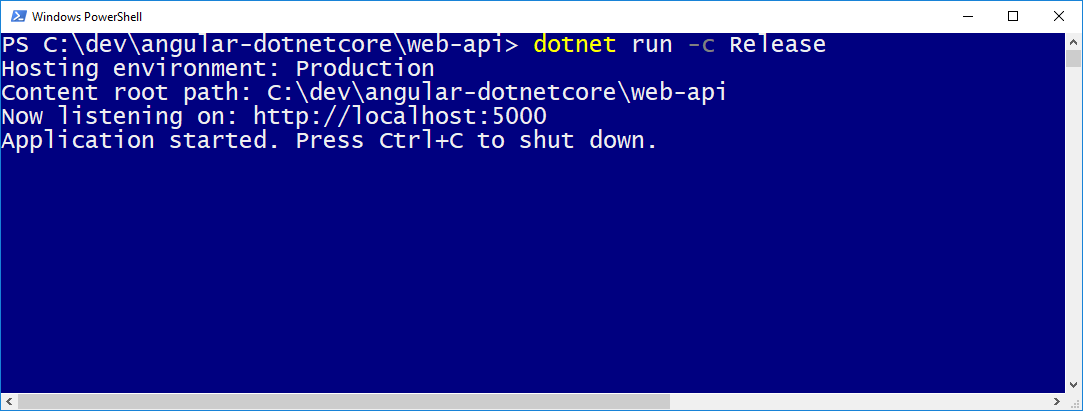
You can already test your app:
- launch the web-api app with
dotnet run
- Launch the angular app and pass the proxy configuration:
ng serve --proxy-config proxy.conf.json
8) To be able to use npm script commands edit the package.json of the angular-app and edit the script section:
"scripts": {
    "ng": "ng",
    "start": "ng serve --proxy-config proxy.conf.json",
    "build": "ng build",
    "build-prd": "ng build --prod --env=prod",
9) To be able to invoke these commands from you web-api, add a package.json inside the root of the web-api app containing. Here we declare the same commands but first cd to the angular-app:
{
    "name": "core-angular-example",
    "version": "0.0.0",
    "license": "MIT",
    "scripts": {
        "install": "cd ../angular-app & npm install",
        "start": "cd ../angular-app & npm start",
        "build": "cd ../angular-app & npm run-script build",
        "build-prd": "cd ../angular-app & npm run-script build-prd"
    }
}
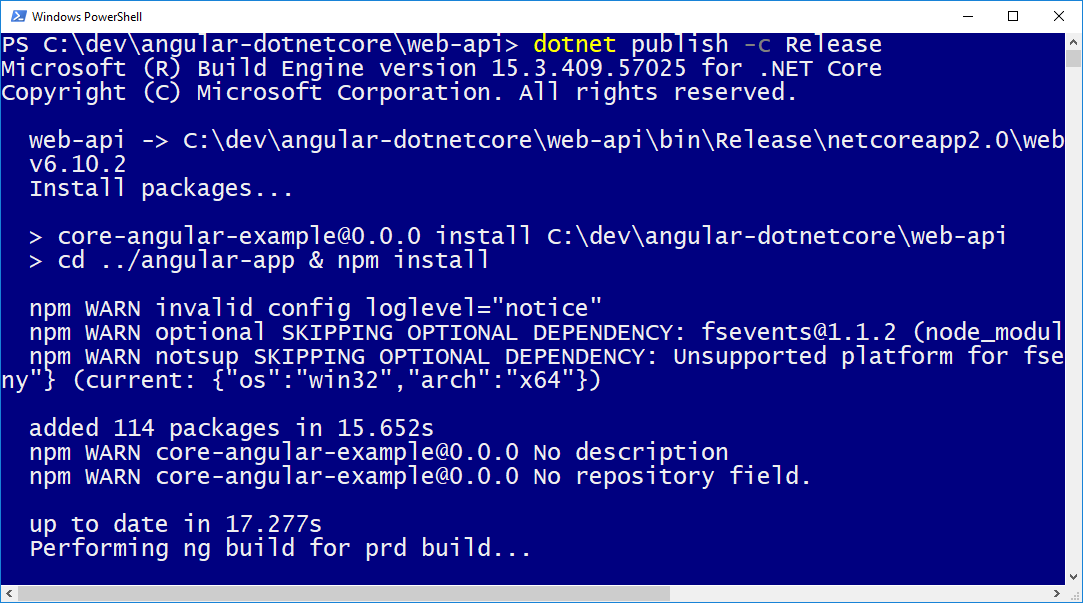
10) Finally, we configure our web-api MsBuild script to invoke the ng build script when running a release build. Therefore, we add the following targets to it:
<Target Name="EnsureNode">
  <Exec Command="node --version" ContinueOnError="true">
    <Output TaskParameter="ExitCode" PropertyName="ErrorCode" />
  </Exec>
  <Error Condition="'$(ErrorCode)' != '0'" Text="Node.js is required to build and run this project. To continue, please install Node.js from https://nodejs.org/, and then restart your command prompt or IDE." />
</Target>

<Target Name="ReleaseRunNgBuild" BeforeTargets="Build" Condition=" '$(Configuration)' == 'Release' ">
  <CallTarget Targets="EnsureNode" />
  <Message Importance="high" Text="Install packages..." />
  <Exec Command="npm install" />
  <Message Importance="high" Text="Performing ng build for prd build..." />
  <Exec Command="npm run-script build-prd" />
</Target>
Now when you launch a Release build everything will be build together.
You can get a package containing all your app by using the publish command.
If you want to publish your site to azure simply use the VisualStudio publish wizard or the Azure Powershell Publish commands.